Monday, March 25, 2013

M4A3 Dry Stowage (Improvised Assault Tank)

I came across these interesting photos while surfing around on the internet a couple of years ago. I always like them and thought it would be a really Kool build for a Sherman...so why Not!

  
The photos appear to be an M4 Sherman that has been modified with the addition of armor plates thus making it into an Improvised Assault Tank (IAT).  It is well documented that certain US Armor formation would cut up the hull plate armor of disable tanks, both American or German that could not be repaired and then weld them on serviceable tanks for add protection. The above photos shows additional armor was added to the front glacis plate and transmission cover but what makes this Sherman  unique is the additional armor on the front half of the turret. It would appear that a disabled M4 turret was cut into sections then wielded on to the turret for even better protection. While there are several photographic examples of added armor to the glacis plate these are the only photos I have seen of this type of modification to the turret.

Then in August of 2012 while attending the open house at the VIRGINIA MUSEUM of MILITARY VEHICLES I came across the museum's beautifully restored and running M4A3 dry stowage example. 

Later that afternoon I found the long out of projection MP Models M4/M4A3 conversion kit at one of the vendor tables.  For only five bucks I though it was good price and should work in providing the basic element for an early M4A3 project, so I picked one up.

The concept behind this kit was to provide the model builder the basic parts needed to convert existing kits into examples that where not available in kit form. An excellent idea that I wish current manufactures would follow. After careful inspection however I was unhappy with the level of detail provided by this kit.  The detail was soft and inaccurate in places, also ejector pin markings where badly placed. Lastly the bottom edge of  the rear lower hull plate with the engine access doors was angled and not rounded as is the case with the dry stowage M4A3.

 I chose not to use MP kit on this build and instead to add the conversion details myself.  I decided to combined these two ideas into one over all model project.  While this may not be totally "accurate" I figured it was an excellent way to produce an interesting subject.

Before I begin any new build I like to conduct a "photo analysis" of my primary reference images This method is good for identifying details that I wish to include on the finished model. 


For this build I will need to use a 47 Degree hull will the small driver and assistant driver hatches and  an rear deck for the Ford GAA gasoline engine.  After a quick search through my spare parts bend I discovered there was more then enough parts. No donor kit would be needed and all the parts for this entire build will come from my spares.  An old Tamiya M4 Sherman would supply the 47 degree hull and turret while an even older Dragon Models Imperial Series M4A3E8 kit would provide the engine deck.

After cutting the engine deck from the Dragon M4A3 I then fitted it to the Tamiya M4 hull.  Using the engine deck and rear hull plate as one unit also helped in setting the correct angle of the rear hull plate. The angle of the rear hull plate on the M4 was at 10 degrees where the angle on the M4A3 was at 22 degrees.


That's it for this installment next up I'll tackle closing off the open sponsons, building up and detailing the lower rear hull and mating the upper hull to the lower hull.

Thanks for stopping by!!

Thursday, January 17, 2013

The Box

Apparently I was a good little boy as Santa (my loving wife that is) brought me a gift I never thought I could possibly get!!


Its called the "Work Box" and is available form the The Original Scrapbox. This thing is beyond Awesomeness!!
And closes up into a rather nice looking piece of furniture when needed...

This is great if you don't have alot room but when opened up all the way still measures around 9 feet in length. Also you will have to put it together...but really if your a model builder then that's not really a problem, is it?  It even comes with a CD that shows you the entire process and took me about six hours over two nights. The only thing I added that was not included was a LCD light just above the work area (not shown).  Lastly this item is not cheap so that should be considered, but I'm totally beyond happy with this Work Box.

Below are some basic stats from the  The Original Scrapbox web page.


Full Dimensions:
Closed - 36" W x 31" D x 72" H
Opened - 108" W x 18" D x 72" H
Table Top - 36" W x 24" D
Included Canvas Tote Sizes:
(3) 6" width x 12" length x 12" high
(16) 12.25" width x 12.25" length x 3" high
(10) 12.25" width x 12.25" length x 5.5" high
(30) 3" width x 12" length x 3" high
(22) 5.5" width x 12" length x 4.5" high
Total: 81
Included Clear Zipper Pouch Sizes:
(2) 13" x 13" Large
(6) 13" x 6" Medium
(12) 6" x 6" Small
Total: 20

Thursday, October 11, 2012

A Long Time Coming and a Long Time Over Due!

I have finished the ol BattleWagon.  A little over 2 years in the making this project took a bit longer then originally planed.  But I would not change anything as I'm satisfied with the finial results. Below are a few pictures of the ol BattleWagon. A full set of in progress and completed photographs can be seen by clicking on the BattleWagon tab above.


Thank you and I hoped you enjoyed following along.  Now to finish up the M20A1!

Wednesday, May 16, 2012

More M20(A1) 81mm Mortar Carrier (ETO)

Just a quick little update on my M20 build. As you can see I finished up the major construction and put a few sandbags around the fighting compartment.  I'll be warping up the small details and working up some crew kit to throw on the back to give it that will lived in effect. Soon it will be on to the painting and weathering and I'm really looking forward to that....Lots of AK and MiG in my future! 

Be sure to follow the M20(A1) Photo essay tad at the top of the page for more photographs.


Thanks for stopping by and as always comments are welcome.

Sunday, April 29, 2012

M20(A1) 81mm Mortar Carrier (ETO)


I’ve been busy over the past month working on this little project for the Big Spring Contest over on Scale Model Addict.  This is a “what if” build placing an 81mm mortar into an American M20 armored car by Tamiya.  Additionally the M20 will be towing a liberated German Sd.Ah.52 37mm Flack Ammunition Trailer from Bronco models accompanied by an Alpine figure.  Originally these would be place on scenic base from Mini-Art but given the compressed build time of just 90 days I’m not sure this will accomplished.

Most of the work thus far has gone into the interior of the M20 converting it to house the Mortar and ammunition for it. The Tamiya kit is rather nice and only minor work is needed to improve the exterior.  Evergreen styrene tubing is the major component used for the scratch building.


Be sure to follow the M20(A1)Photo essay  tab at the top of the page for more photographs.

Thanks for stopping and as always comments are welcome.  

Thursday, March 29, 2012

Little Sure Shot Part-1


For this project I'll be tackling the AFV Club M5A1 Late.  This project was originally conceived as part of an online model build. While I will try to finish this within the allotted time my track record is...shall we say "Not the Best" 

I always like the boxy little look of the Stuart family of fighting Bang Boxes. But with its more refined lines and sloping armor the M5s looked more interesting to me.  I knew I wanted to model a late version with the two prominent features; the Anti-Aircraft Machine Gun shield located on the right side of the turret and the large stowage ben situated on the rear plate.  

After pouring over my reference material I came across two photos of M5s that I really liked. While accuracy is important I’m not a slave to it and what I wanted was to build an overall representation of an M5 in the European Theater of Operations as it would appear in the field.  So I decided to combine the two photos into one model. 

The first photo is from the well-known book by Squadron, Stuart in action.


This picture captures so much of what I wanted for the look of an M5 operating in the field.  I mean this just screams “BUILD ME!!”

Before I get to building I like to sit down at the computer and preform a little photo analysis. I picking out the features that I want to include during the build and identify any mystery items.  The blow picture shows kind of how I do that.


As you can see since this is from the front I’ll use other suitable photo reference for the remaining parts of this little gal. 

The next photo is taken out of Concord’s U.S. Light Tanks at War,...


 ....And the photo analysis.


Two other photos that inspired me are of an M5 restored and dressed up in Marine Corps colors. Not exactly ETO but you can see why I like these.  Unfortunately I pulled these outstanding photos from a web site quit a long time ago and I don’t have any information on them. 


Next up are some more inspirational pictures that I have collected over the years from various sources but mostly from web sites. The focus of these is stowage, I love me some stowage, and how it is placed on the respective vehicles.   


The 
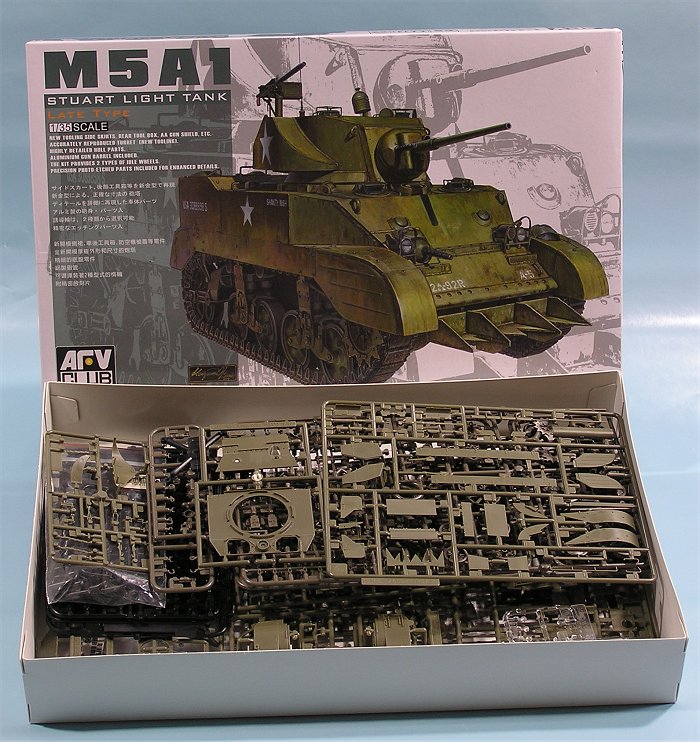
basis for this build is the AFV Club M5A1 Stuart Late Type, AFV35161,  in 1/35  Scale.  This kit contained all the features noted above that I was looking for and is really the only serious choice as the Tamiya M5 would be more work then I was looking for.   PMMS has a nice review of AFV's M5A1 Late


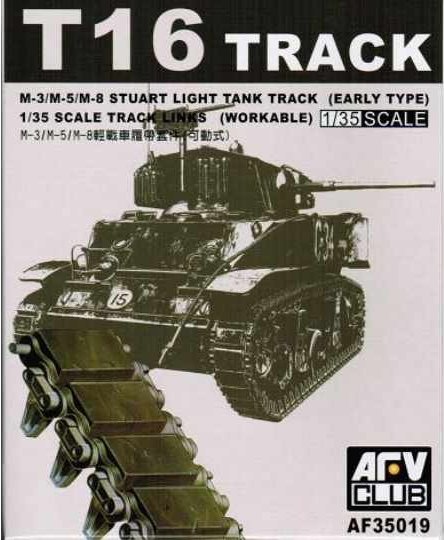
The additions I planned to use for this build are the AFV Club T16 Tracks (AF35019), Verlinden’s M5A1 Stuart Interior Update (VER 1562) and RB Models barrel replacements for the 37mm Gun and the .30 cals (35B24 and 35B82). 


While the Verlinden Interior Update is not really made for this kit I figured it would be a good place to obtain complex shapes such as the transmission housing and the turret floor. Based on the level of detail I wished to achieve I would assess the other Verlinden parts to see if I would use them or scratch build new ones.  However some care will be needed when using this set to ensure parts are placed in the correct areas and that the Verlinden items are the correct size. Either way using some or all of the Verlinden parts will help save a little bit of time and sanity. RB Models make some excellent barrel replacements and are reasonably priced but are hard to come by here in the States.  I was able to locate a supply from our Canadian neighbors to the north The Barrel Store…Thanks guys!


Construction of the Lower Hull, Suspension and the T16 Tracks 

The lower hull is a multi-part affeir, not the old style tub set-up.  Once the parts where removed and clean you attach the sides.  The first thing you’ll notice is that AFV kits are NOT Tasca kits so the fit is not as good.  That’s not to say it is terrible, just a little patients will be needed.  Several years ago I picked up a couple of right-angle clamps from a company here in the states called Micro-MarkThese clamps come in two sizes,Original 'Right Clamp'and Long 'Right Clamp'.  I used the clamps to assist in making sure the hull sizes went on correctly. Once the hull side where attached I then built up the rear of the lower hull as per the instructions.

The suspension was also build according to the instructions. Only some minor bolt head details were add to the road wheels. On the right side I used the early pattern idler wheel and an open spoke road wheel with the opening on both plated over.  The idea here is to display them as field repair replacements using early parts.

 The AFV T16 tracks are nicely detailed and go together rather easily despite their rather small size.  To help the process and making sure the tracks stay somewhat straight I built a simple jig. I was fortunate to locate some pre-cut bass wood that was the same width as the track pad allowing the end connectors to be fitted. I work in groups of three track links and then made up the track runs as needed. Once the tracks were fitted the extended end connectors (EEC) (duckbills) are attached. According to the reference photos being used for this build the EEC were attach to every-other end connector. This adds a great little detail to the overall model.


One last detail item that was added was the texturing of the track faces to show some ware-n-tear. This was done using a dermal tool with a cutting bit.  With the tracks installed that wraps up the major construction for the lower hull, only a few odds-n-end remained. 


Here is sneak peek of the next phase of this build…The interior!
Be sure to checkout more photos of this build under the "Little Sure Shot" tab at the top of this page.
Thanks for stopping by and I hope you enjoyed your stay. 
Please feel free to leave any comments and or questions.